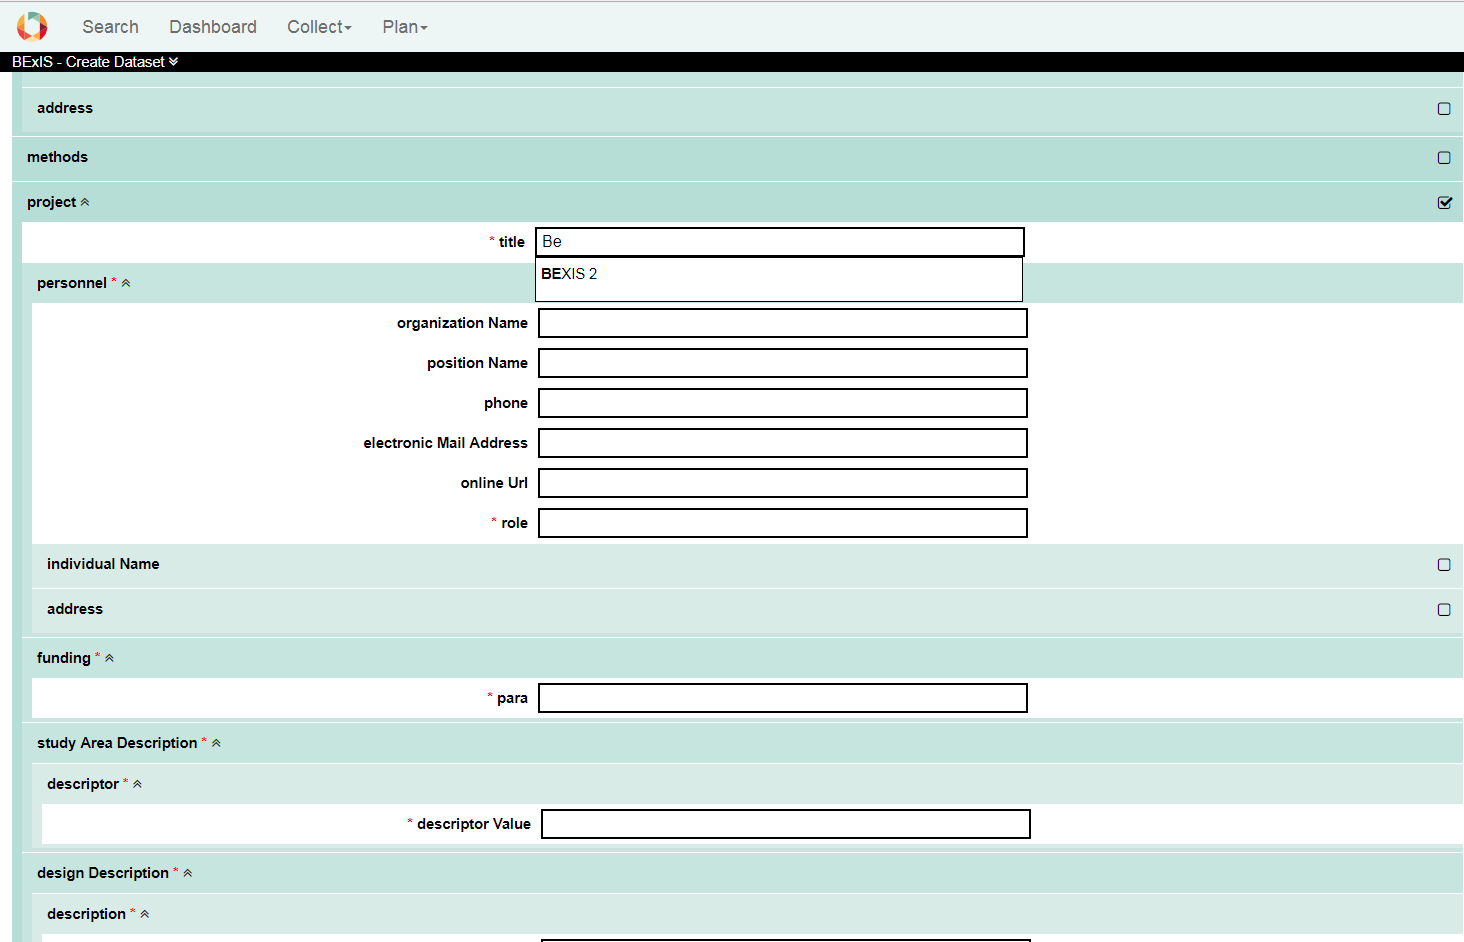
1. Overview
Export Metadata and Manage Metadata Structure are available via Setup (Cog button).
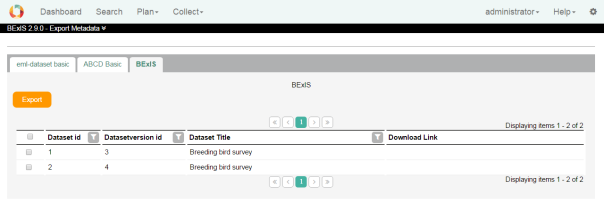
2. Metadata Export
The data grid in each tab shows all datasets belonging to the selected metadata structure. Select one or more checkboxes close datasets you would like to export. Clicking on the Export button create the metadata XML files and provides download links in-line.
3. Mapping tool
mapping tool in BEXIS2 provides the predefined keys and party types for the metadata structures, which are created in the system.
Mapping a metadata structure hast two main advantages:
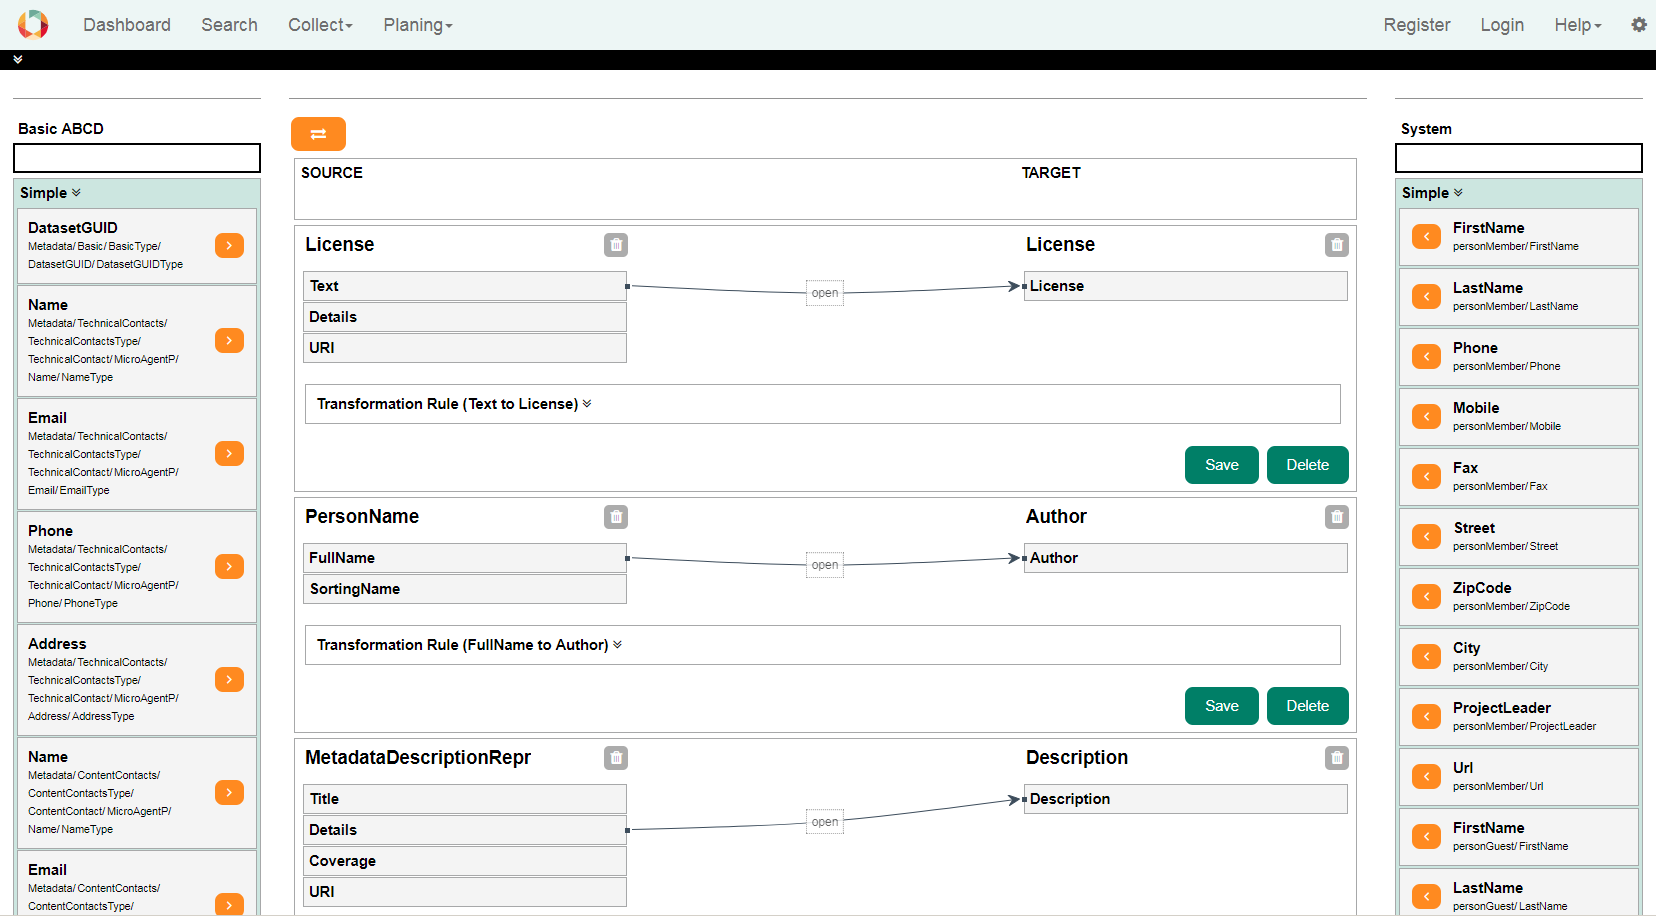
3.1. Mapping OverviewMapping tool is accessible through the Manage Metadata Structure by clicking on the arrow buttons. Mapping could be defined to or from the system.The page of Metadata Structure Mapping is divided into 3 sections. The source is displayed on the left and the target on the right side. All created mappings are displayed in the middle.
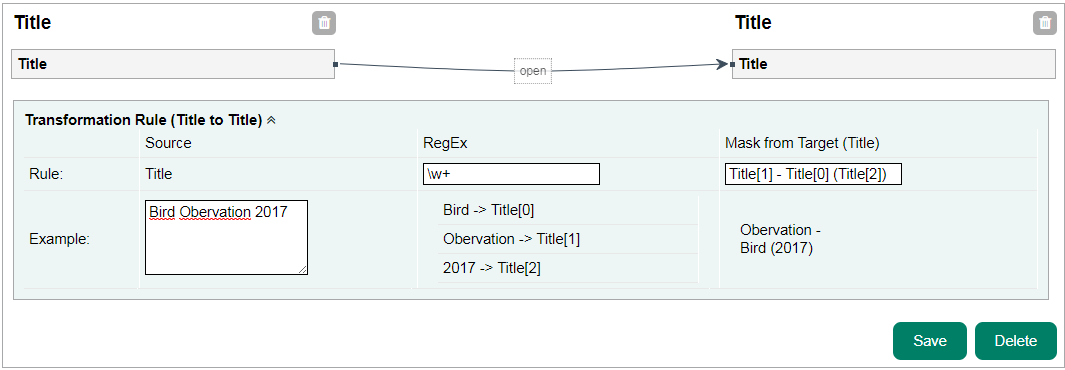
Source and target in the left and right side includes two parts: Simple and Complex blocks. First name, last name or full name of a person are examples of Simple elements. A Complex element could be a person. Search box is provided for each side (source or target) seperatly. Mappings are connections between the source and the target. There are different connection possibilities between the simple attributes. Generally only the connection between two simple attributes is considered. With the aid of a transformation rule, it is possible to cover a wide range of different cases. A transformation rule consists of a RegEx and a mask. With an example you can check the values and the expected result. 3.2 Mapping ExamplesFollowing is some examples of one to one, one to many and many to one mapping. Example: One to OneThis example creates a connection between two titles. All words are separated by a RegEx and then arranged differently via the mask.
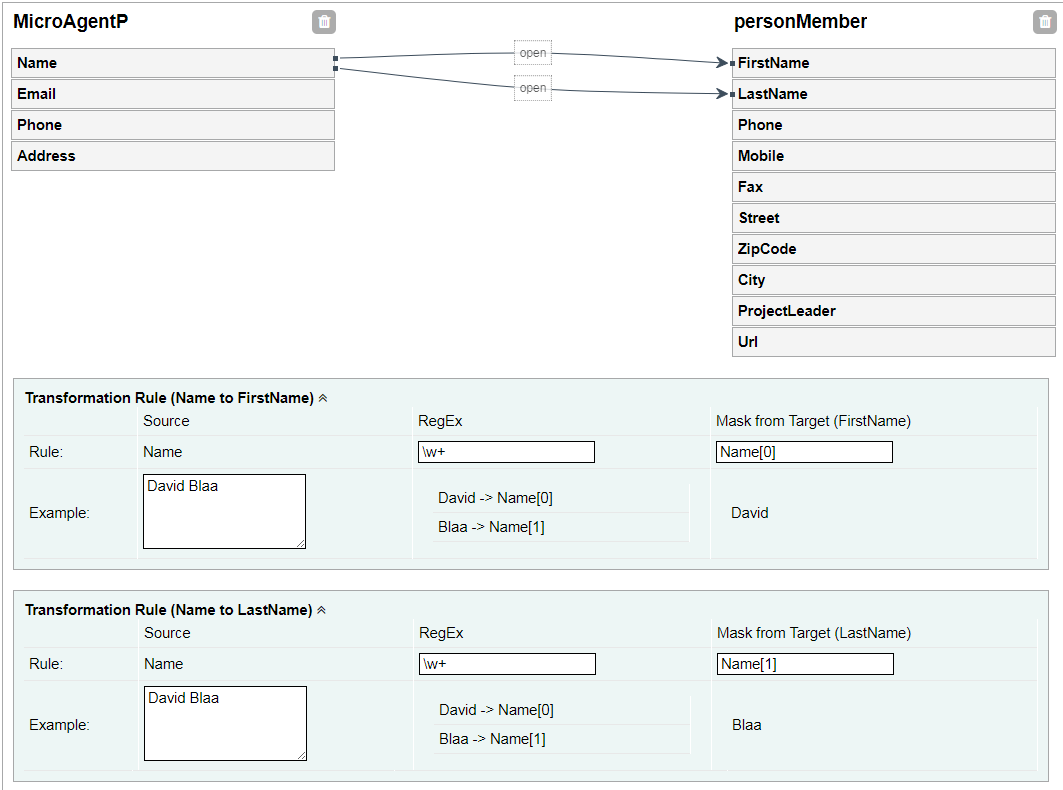
This example creates a connection between a name in one side and the FirstName and the LastName in other side. In the transformation rule, the first and last names are separated from one another by a RegEx and then positioned in the mask via the variable.
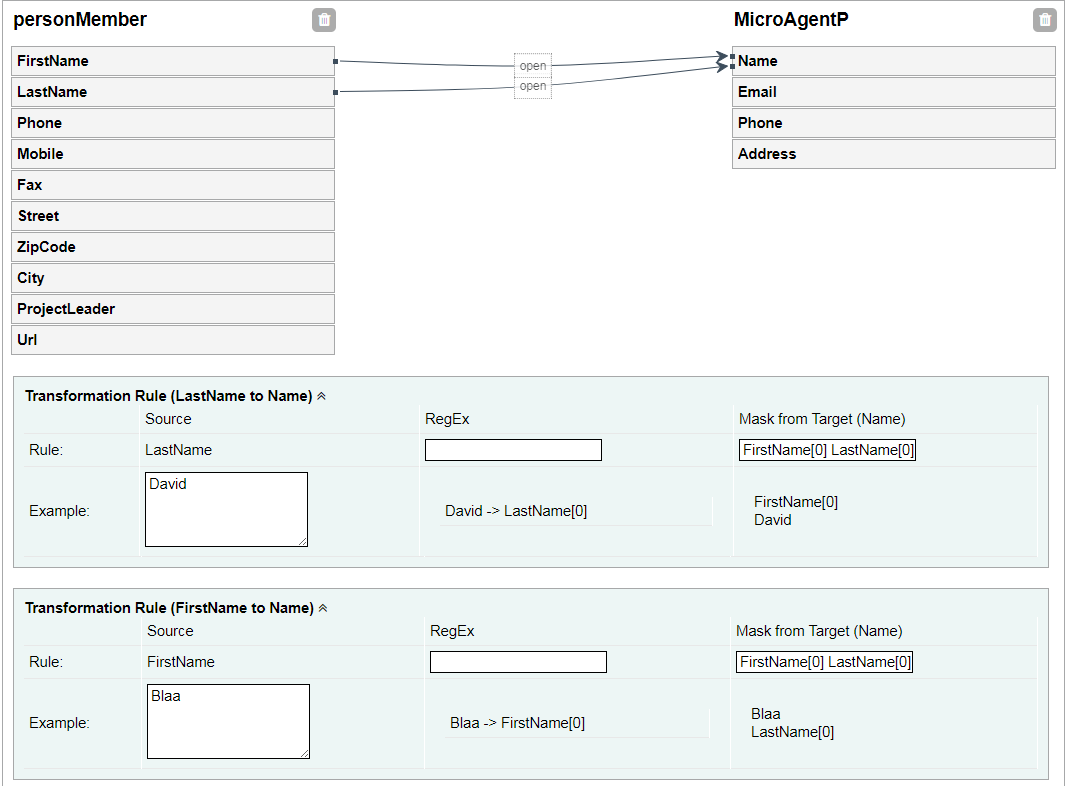
This example creates a connection between the FirstName and LastName by a name. Here is no RegEx needed but the mask ordered from both variables.
3.3. Create a mapping
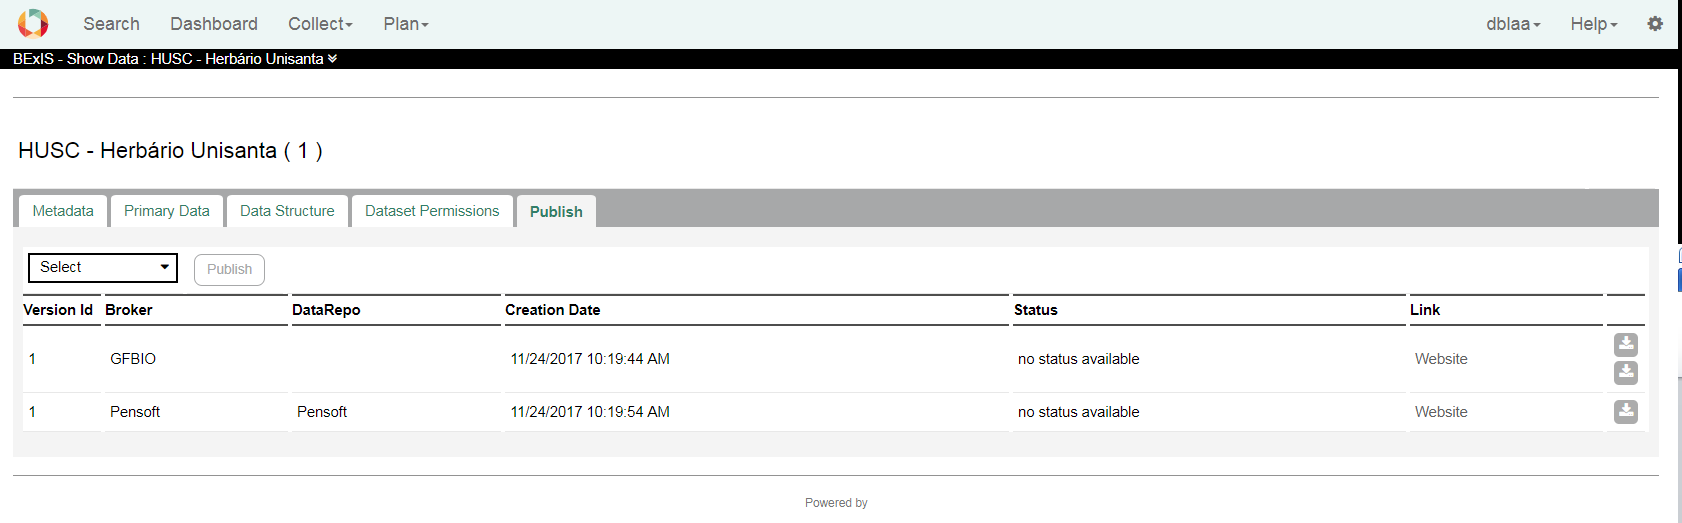
4. Publishing a Dataset VersionPrepare the data is from now available for two brokers and a three data repositories.
There is limitation to publish a dataset version: 4.1. PublishPublish a dataset is attainable through the Publish tab on the dataset view. All available data center are listed in a dropdown. After selcting a data center, system tries to convert the data and the metadata as defined in the submissionConfig.xml. If something fails a warning message will displayed.
There are two types of fails:
4.2. GFBIOVia the GFBIO portal you can start a submission and publish your dataset. Depending on the subject of the data set, a suitable Data Repository is defined. There are different main Types:
Each data repository has different data requirements. BEXIS2 offers an export for Pangea and Collections. The data for the collections is stored in a zip file includes
For the Pangea, the metadata and primary data are stored in a text file.
Go to top |